OpenMediaVault is great NAS OS and I prefer it over FreeNAS or other BSD based NAS solutions. I guess that OMV being based on Debian is a major plus with me. But, there is a nasty side of OMV – they do not support using OS drive for data storage (as noted in OMV installation guide) and if you install OMV on a 1TB drive you can say goodbye to the nice 950GB of free space on that device. Recommended solution for this is installing OMV on smaller drive or on USB device. I had no luck using USB devices, every device would die after few weeks or months, and using seperate smaller SATA drive is also a nogo because I have no extra/free SATA ports in my NAS.
Wouldn’t it be nice if we could use 2 drives in RAID1 and install OMV on one partition and use rest of the free space for data? We can make this happen with a little magic. Let’s begin.
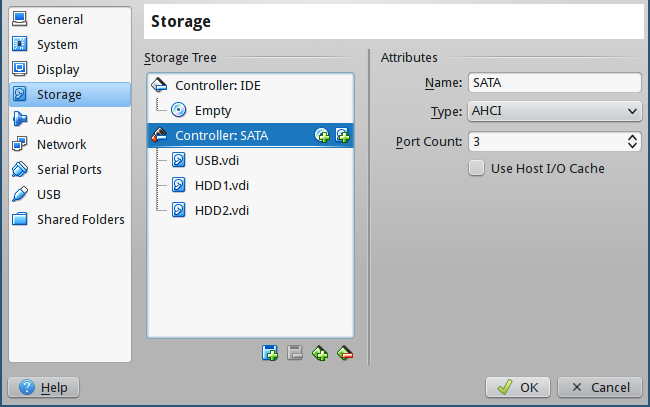
I will be using Virtualbox for this, but same principles apply on hardware machines.

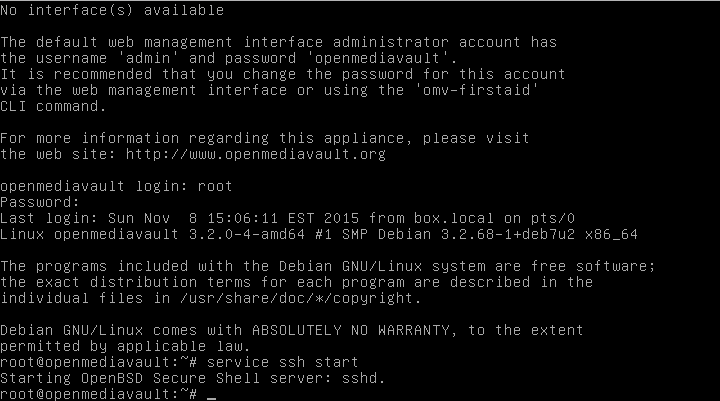
First install OMV on a USB drive, and boot for the first time. Shut down OMV and insert two drives you actually intend on using, and boot OMV from USB device. Once OMV is up and running, login as root and start SSH service with following command:
service ssh start

this way you can connect to OMV remotely via SSH, it’s easier to work that way. Now that you are logged in via SSH you need to determine your drives, I use lsscsi for that, but you can use whatever you want. In my demonstration I have OMV installed on /dev/sda, while /dev/sdb and /dev/sdc are SATA drives.
First we need to create partitions on SATA drives, I will use parted for creating 3 partitions, first for GRUB, second for OMV root, and third for data.
parted -a optimal /dev/sdb mklabel gpt

parted -a optimal /dev/sdb mkpart grub ext2 2048s 12M

parted -a optimal /dev/sdb mkpart root ext4 12M 4096M

parted -a optimal /dev/sdb mkpart data ext4 4096M 100%

parted -a optimal /dev/sdb set 1 bios_grub on

parted -a optimal /dev/sdb set 2 boot on
You can change sizes of partitions, I’m using 4G for OMV root partition, in my case that is enough you can change it to better suit your needs. You should end up with something like this:
root@openmediavault:~# parted /dev/sdb u s p

Model: ATA VBOX HARDDISK (scsi)

Disk /dev/sdb: 83886080s

Sector size (logical/physical): 512B/512B

Partition Table: gpt
Number Start End Size File system Name Flags
1 2048s 22527s 20480s grub bios_grub
2 22528s 7999487s 7976960s ext4 root boot
3 7999488s 83884031s 75884544s ext4 data
Now we clone this partition table to second drive /dev/sdc with sgdisk:
sgdisk -R=/dev/sdc /dev/sdb

sgdisk -G /dev/sdc
Now that we have two drives with identical partition setup we can create mdadm RAID arrays on those partitions. First array will be for OMV root drive on /dev/sd(b|c)2 partitions and other array on /dev/sd(b|c)3 partitions.
mdadm --create /dev/md0 --level=1 --raid-devices=2 --metadata=0.90 /dev/sdb2 /dev/sdc2

mdadm --create /dev/md1 --level=1 --raid-devices=2 --metadata=0.90 /dev/sdb3 /dev/sdc3
Create ext4 filesystem on /dev/md0:
mkfs.ext4 /dev/md0
With filesystem on /dev/md0 we can mount it on /mnt/root and sync OMV to /dev/md0.
mkdir /mnt/root

mount /dev/md0 /mnt/root/

rsync -avx / /mnt/root
One more thing, we must add new arrays to the /mnt/root/etc/mdadm/mdadm.conf, and change UUID of / mountpoint in chrooted OMV instalation. You can add new arrays to mdadm.conf with following command:
mdadm --detail --scan >> /mnt/root/etc/mdadm/mdadm.conf
Find UUID of /dev/md0 with blkid command and change UUID for / mount point in /mnt/root/etc/fstab.
Now you are ready to bind mount /dev /sys and /proc to our new root drive and chroot there:
mount --bind /dev /mnt/root/dev

mount --bind /sys /mnt/root/sys

mount --bind /proc /mnt/root/proc

chroot /mnt/root/
Congrats, you are now in your OMV installation on RAID array, there is only GRUB setup left to do and you are golden. Install GRUB on both new drives, update grub configuration and update initramfs and that is it.
grub-install --recheck /dev/sdb

grub-install --recheck /dev/sdc

grub-mkconfig -o /boot/grub/grub.cfg

update-initramfs -u
Exit chroot with exit and shutdown OMV. Remove USB device and boot into OMV on RAID1 array, once boot is done login as root via SSH and create filesystem on /dev/md1 with
mkfs.ext4 -m 1 -L DATA /dev/md1
And this is it, login to web interface, mount /dev/md1 and start using OMV installed on RAID1 array.

vl
i know this is an old blog but I just have to say thanks to the author.
I recently decided to use OMV for my home lab. and it have always been an issue for me to run system on raid1 . could never setup correctly.
this write up does work, and work great. you have to follow it carefully, I had to restart 3 times from start, but it does work. not even that , you can do the same going from single HDD setup , not only from USB. I will try to use that with other OS HDD installs.
thanks again.
Christophe
Excellent, big thanks to you for this tip.
This work for me too 🙂
Now my backup server is ready to go
RFV
Yes, this was usefull as the GUI on OMV 2.25 was unresponsive for cerating RAID (on RPi)
Ben
Awesome!
It works like a charm, big big thanks!
Ben
But how to “re-build raid volume” after installing a new disk?
Ben
But how to re-build raid volume after inserting a new disk?
Josip Lazić
If your drive in RAID1 array has failed you can replace it following this guire: https://www.howtoforge.com/replacing_hard_disks_in_a_raid1_array
Ben
Thanks 🙂
Zoltan
This is not working for me…. (No boot device has been detected).
I think problem lies here somewhere:
“Find UUID of /dev/md0 with blkid command and change UUID for / mount point in /mnt/root/etc/fstab.”
How can I do this??
Regards
Zoltan
DAVID
Hi, could you please explain me something ; after found the uuid : root@openmediavault:~# blkid /dev/md0
/dev/md0: UUID=”65f0c15f-d298-4af5-8fee-a33b67f9bc56″ TYPE=”ext4″
how can i change it ? THX
Igor Novikoff Mithidieri
Thank you! It worked perfectly.
I did not need a pendrive. I used 4 x 4GB hard drives each. I installed the system on the first disk, then created a smaller partition on the other 3 disks. Created raid volume. Then I copied (rsync) the systems to the minor partition (raid) and functioned perfectly.
Finally, I deleted Disk 1 and included it in the raid scheme.
For those who need something similar:
# Create disk sceme
parted -a optimal /dev/sdb mklabel gpt
yes
parted -a optimal /dev/sdb mkpart grub ext2 2048s 12M
parted -a optimal /dev/sdb mkpart swap linux-swap 12M 4096M
parted -a optimal /dev/sdb mkpart root ext4 4096M 10240M
parted -a optimal /dev/sdb mkpart data ext4 10240M 100%
parted -a optimal /dev/sdb set 1 bios_grub on
parted -a optimal /dev/sdb set 2 boot on
#Copy to other discs (don’t copy to actualy system disc)
sgdisk -R=/dev/sdc /dev/sdb
sgdisk -G /dev/sdc
sgdisk -R=/dev/sdd /dev/sdb
sgdisk -G /dev/sdd
# Create the raid w/ 4 discs (frist disc is not in the raid in this moment)
# We create only 2 raids in this moment. Swap area and System area
mdadm –create /dev/md1 –level=10 –raid-devices=4 missing /dev/sdb2 /dev/sdc2 /dev/sdd2
mdadm –create /dev/md2 –level=1 –raid-devices=4 missing /dev/sdb3 /dev/sdc3 /dev/sdd3
# Create file systems
mkswap /dev/md1
mkfs.ext4 /dev/md2
mkfs.ext4 -m 1 -L DATA /dev/md3
# Mount and copy system
mkdir /mnt/root
mount /dev/md2 /mnt/root/
rsync -avx / /mnt/root
# update the raid config file
mdadm –detail –scan >> /mnt/root/etc/mdadm/mdadm.conf
# Finde the UUID of md2 and update /mnt/root/etc/fstab
blkid
# Mount system
mount –bind /dev /mnt/root/dev
mount –bind /sys /mnt/root/sys
mount –bind /proc /mnt/root/proc
chroot /mnt/root/
# Update grub
grub-install –recheck /dev/sdb
grub-install –recheck /dev/sdc
grub-install –recheck /dev/sdd
grub-mkconfig -o /boot/grub/grub.cfg
update-initramfs -u
# Ok, your system are OK. Reboot OMV.
# When system up, copy the partition schema to the frist disc (system disc)
sgdisk -R=/dev/sda /dev/sdb
sgdisk -G /dev/sda
# Add this disc to raid
mdadm /dev/md2 –add /dev/sda3
# Create the raid for the DATA
mdadm –create /dev/md3 –level=10 –raid-devices=4 /dev/sda4 /dev/sdb4 /dev/sdc4 /dev/sdd4
# Ok, finaly, update the grub on frist disc
grub-install –recheck /dev/sda
grub-mkconfig -o /boot/grub/grub.cfg
update-initramfs -u
# Finish!
Dude
Hi,
be careful to not use “sfdisk” command to recover partition table from the healthy disk, sfdisk does not support GPT.
Use “sgdisk” instead.
If new disk is /dev/sdb and healthy disk is /dev/sda, then do
sgdisk -R=/dev/sdb /dev/sda
to replicate partition table from sda to sdb.
Finally, use OMV GUI to recover RAID mirror.
Aiden
Hі there еvery one, hеre еνery person is sharing ѕuch knowledge, tһerefore іt’ѕ good
to rеad this webpage, and I used to gо to ѕee thiѕ weblog all the tіme.
Alex
Hi there and thanks for this post !! Very useful !!
I followed the instructions and I successfully installed OMV on two disks creating RAID arrays.
After few days, I did an OMV update and failed. Trying to fix that, I run via the command line (as root) the `omv-upgrade` command. Following it’s messages I run `dpkg –configure -a`. (Until now everything is irrelevant with this post).
After that fixing packages command the system asked:
The GRUB boot loader was previously installed to a disk that is no longer present, or whose unique identifier has changed for some reason. It is important to make sure that the installed GRUB core image stays in sync with GRUB modules and grub.cfg. Please check again to make sure that GRUB is written to the appropriate boot devicesAnd this is where I could not decide in which disk I should set the grub for installation, since I could not decide which disk. I chose nothing.
Should I run the grub relevant commands again (eg grub-install –recheck /dev/sdc) or leave it as is ?
Regands